Using Azure Traffic-Manager
Azure Traffic-Manager is a simple, low-cost way of ensuring your application's availability is maintained, while ensuring your users
get the best performance possible.
At the simplest level Traffic Manager is a DNS service that provides you with the DNS entry for your service that has the shortest network path to the requesting browser.
The Scenario
Say you have a web application you want to make available on a global scale. You have a large number of customers in Australia, Los Angeles, New York,
London, Germany and China.
Terminology
As with any technology Azure has its own terminology that you will come across when setting up Traffic Manager profiles. You will need to have some experience with Azure before creating a Traffic Manager profile.
AppService
An AppService is a virtual machine that can be dedicated to a WebApp (website), or any number of pre-packaged Azure-based services.
Traffic Manager Endpoint
Something that the endpoint answers to, be it a website or external IP address
Service Plan
App Service plans represent the collection of physical resources used to host your apps.
Resoiurce Group
This is a container in the Resource Manager that holds related resources for an application.
Azure Portal
The interface for managing your Azure subscription and products. See: portal.azure.com
For more definitions, see the Microsoft Azure Glossary
Create one or more AppServices
AppServices are the websites or VMs that provide a web application to customers. You can roll-your-own or choose
from one of many dozens of pre-built templates provided by Microsoft of their partners..
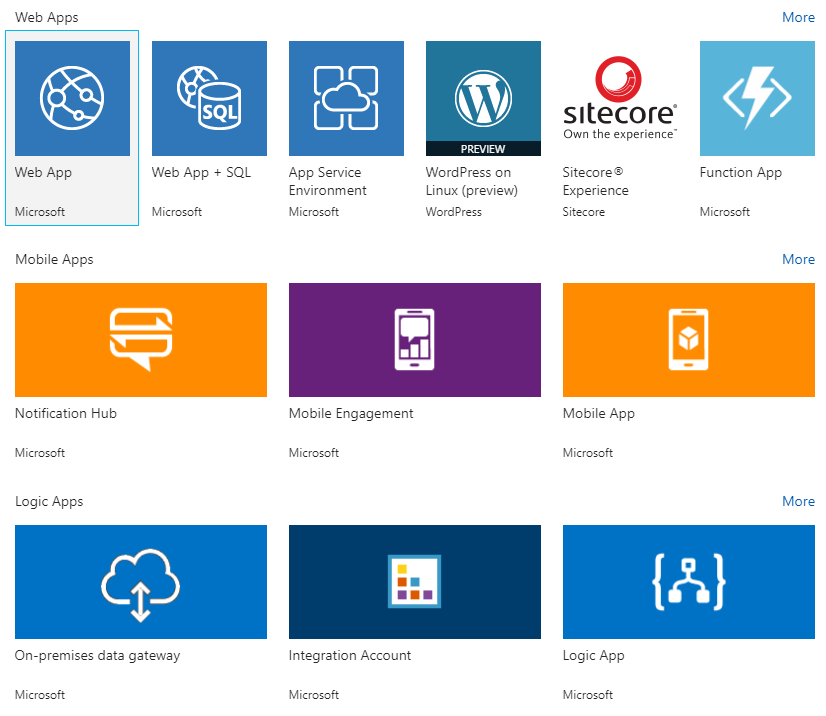
From the Azure Portal homepage go to AppServices>Add and select a service you want to have behind Traffic Manager. In our case we're
creating a simple Web App. Once you've Clicked Create you'll get options to give it a name, specify the OS it will be running on, the
Resource Group (where it will be hosted) and the service plan (how powerful it will be).
As you can see from the image below, you can do almost all of this from one screen. The app name you assign here will be directly correlated to the
hostname of the service you will use to access it. For example if you gave it the name awesomesite, you would be provided with an alias of awesomesite.azurewebsites.net.
If you didn't need anything else you could leave it here.
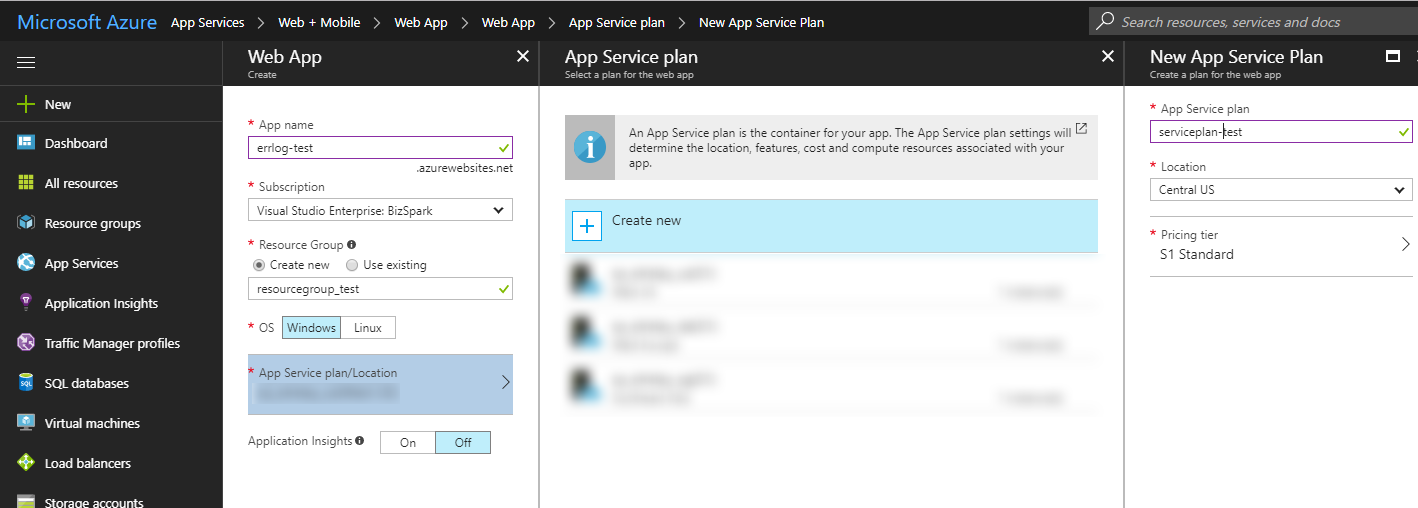
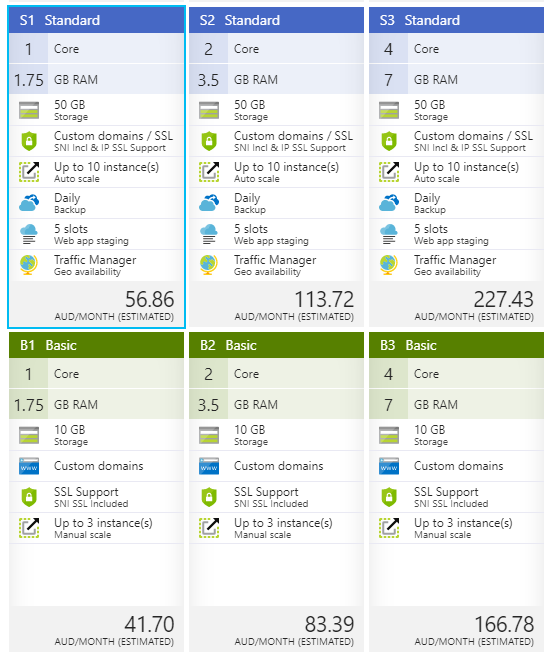
If you wanted to provide your custom domain name and SSL certificates you can do that later on but you will need to specify that the pricing tier is Standard S1 or higher.
Once you click Create it will go away and deploy the service for you. You now have a functional (albeit empty) AppService.
I'm n
While you can technically have a single AppService behind Traffic Manager, in realistic terms you would want more than one. In order to create the rest,
you can go through these steps again choosing a different location each time to meet the needs of your application.
Creating a Traffic Manager profile
Now that you have a few AppServices created you can go ahead and set up your traffic manager profile.
In the Azure Portal go to Traffic Manager profiles>Add, giving it a name (and thus an alias to access it with) and a resource group.
The resource group doesn't really matter in this instance as it's just something to attach the profile to. As it's a global service it won't be tied to an
individual location.
That's it! Sort of. The traffic manager and AppServices have been created but there will be a few steps before you can actually use it.
Traffic Manager configuration
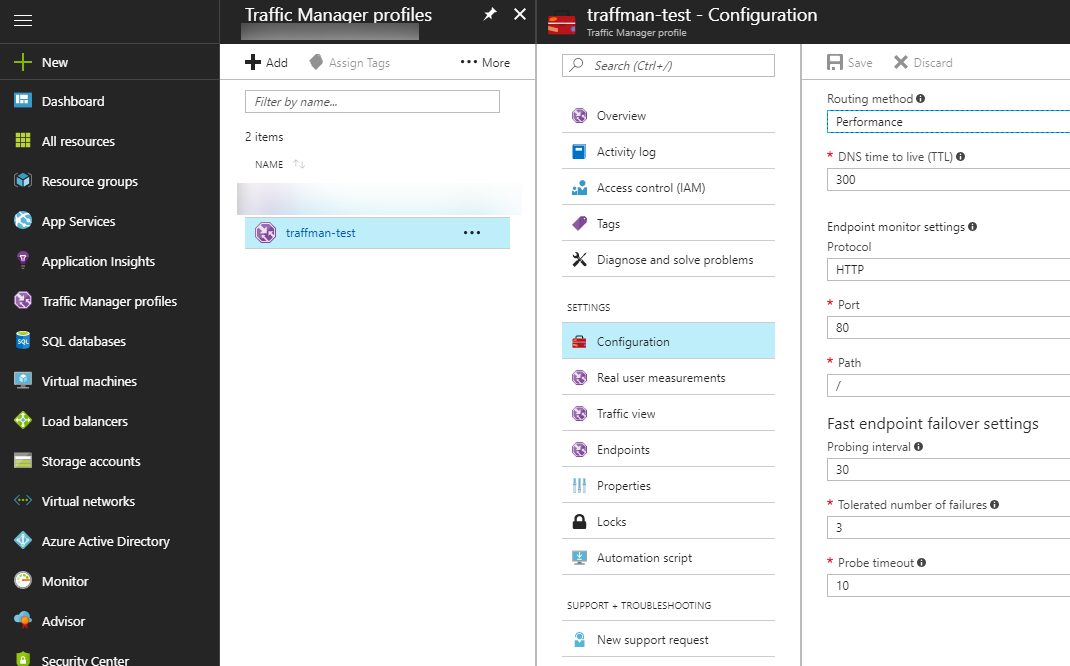
From the Traffic Manager profiles in the Azure Portal you will have a Configuration option which lets you specify the high level configuration of the profile.
The useful items here are:
Routing Method
In most cases you can go with Performance. This provides customers with the IP address of the closest node as well as the ability to fail over
to another node should that one go down. See this link for a full explanation of the other options
DNS TTL
This is the TTL for the Traffic Manager alias's entry in DNS.
Endpoint monitor settings (Protocol, Port, Path)
This is how Traffic Manager knows the Endpoint is up and should be included in the load-balancing configuration. If you're only listening on HTTPS you can specify that along with port 443, or if you have a specific
health-check page on your site, you can provide that value here so that Traffic Manager will know if there are any problems with your site.
Azure only treats 200 OK responses as successful health check. If any other response code is received then it will proceed by rechecking the endpoint a number of times before marking the endpoint as unhealthy. The exact
specifics will depend on the failure thresholds within the Traffic Manager configuration. More detailed information can be read here.
Failover Settings (probing interval, number of failures, probe timeout)
These are all related to the check that the Traffic Manager performs, to see if the node is up. The big thing to note here is that if you change from the default of checking every
30 seconds to 10 seconds you will incur additional charges as that is considered a fast interval health check. See this link for more information.
You will also need to add some Endpoints to it, otherwise nothing will work. As you've already created a number of App Services this should be pretty straight-forward, so all you
have to do is go to your Traffic Manager Profile and select Endpoints>Add. From here you've got a choice of Endpoint types. You can put your own, externally hosted website in the mix
along-side Azure App Services by selecting External Endpoint from the Type dropdown list.
Seeing as we've gone through all the effort of creating our AppServices we'll set:
- Type = Azure Endpoint
- Name = [a name we want to give the endpoint]
- Target Resolution type = App Service
- Target Resource = [select one of the AppServices you created earlier]
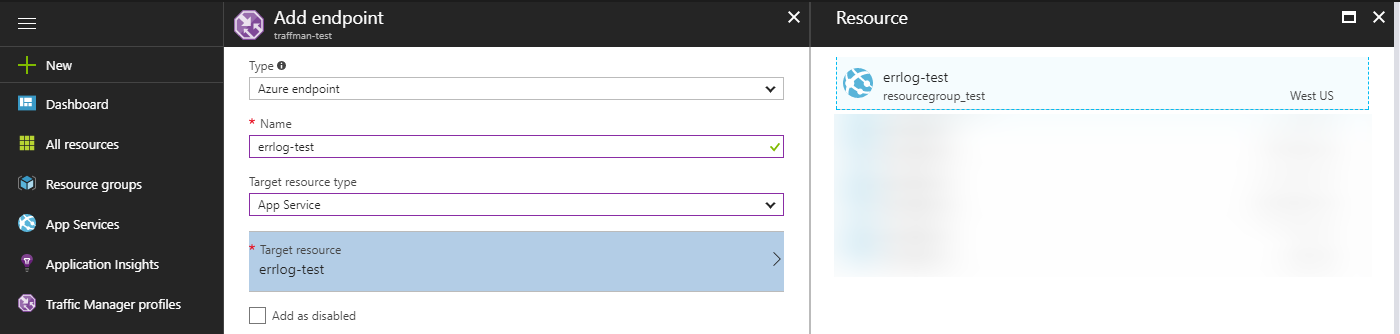
If it's created successfully it will display the endpoint in the list and show a status of "Checking Endpoint".

All going well it will eventually say "Enabled" (although you might have to click Refresh once or twice). If you have more App Services you want to add to the cluster just click "Add" and
put them in as you did with this one.
From there you should be able to open the hostname of the traffic manager ([alias].trafficmanager.net) or app service ([alias].azurewebsites.net)
and see a generic welcome message, unless you've already uploaded content to the site.
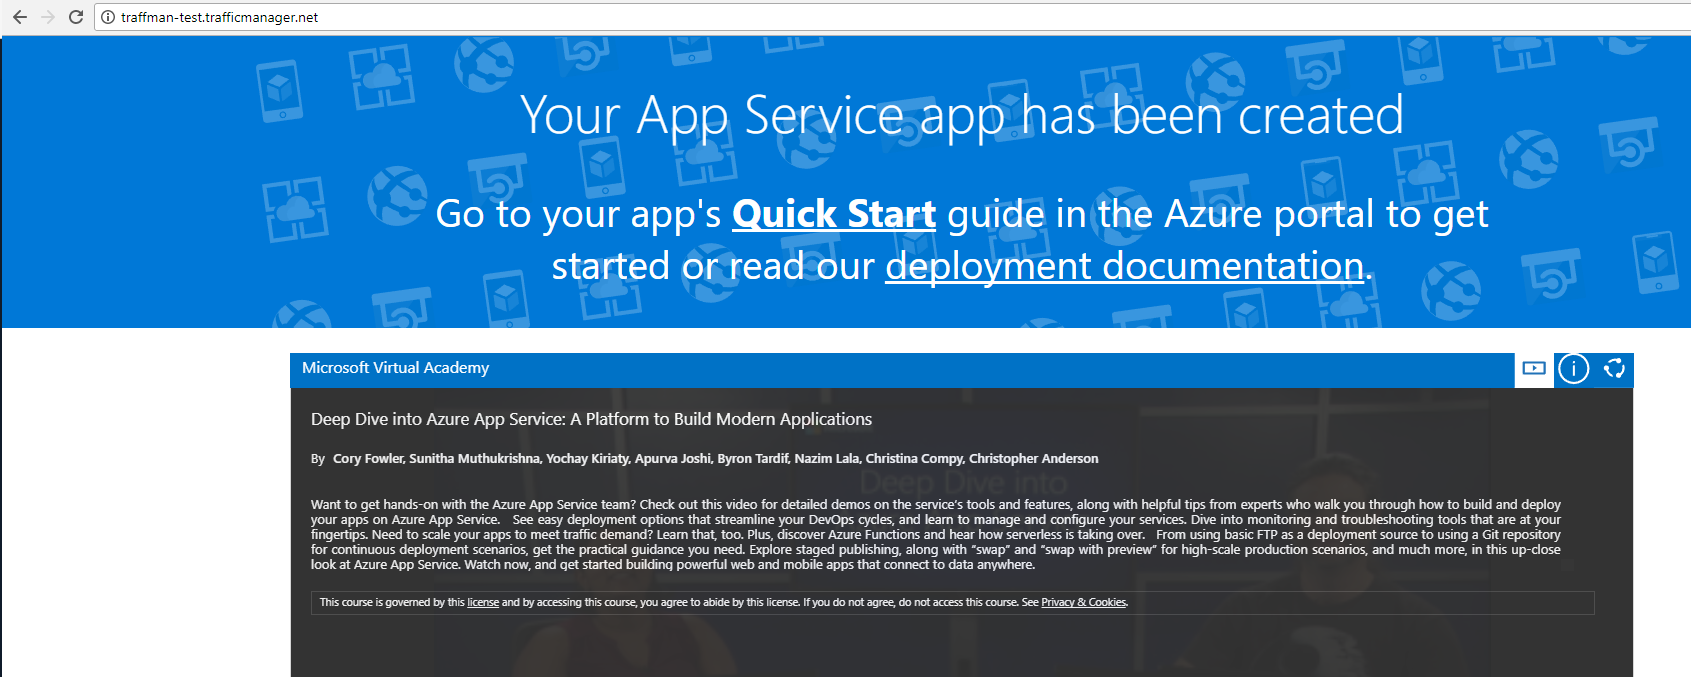
Congratulations!! You have successfully created one or more Azure Web Apps and a Traffic Manager profile. You can play around with turning off nodes to verify you are still able to access the site via the http://[alias].trafficmanager.net address. You can also check the individual instances via their http://[alias].azurewebsites.net address.
Troubleshooting
I can't add a AppService to a Traffic Manager profile?
Only AppServices assigned the Standard S1 pricing tier or higher are capable of supporting Traffic Manager (also SSL certificates and custom domain names)
My Traffic Manager profile and AppServices have been created. Everything is assigned but the traffic manager alias doesn't respond to ICMP ping requests?
If none of the AppServices are running or they're not assigned the Standard S1 pricing tier or higher then there won't be anything for Traffic Manger to forward
customers to and thus it won't resolve. Check the health of your Traffic Manager endpoints.
I don't want to use the *.trafficmanager.net or *.azurewebsites.net addresses that Azure gives me.
Seeing as the Web Apps (at least in this example) are using the Standard S1 pricing Tier for Traffic Manager capabilities this allows you to use SSL and Custom Domains as well.
To get access to custom domains go to AppServices>[your appservice name]>Custom Domains>Add Hostname and enter a hostname. You'll be prompted to validate the entry which you
can by adding a custom DNS entry to show you 'own' that domain.
Similarly to Custom domains, SSL Certificate (which will be just below Custom domains) are accessed through the App service. You can import an existing certificate or
upload one from your computer. You can even use free ones provided by LetsEncrypt.
All that remains now is to update the DNS of your custom domain so that www.[yourwebsite].com is a CNAME for [alias].trafficmanager.net and you'll be good to go.
Summary
It's a fairly technical process but compared with spending tens of thousands of dollars on GSLB devices and requiring specialty networking knowledge
this is a reasonably simple yet powerful process.
The major benefits of this approach are:
- You can provide world-wide coverage to provide better performance for your customers
- Your customers will stil be able to receive service if one of the endpoints go down.
- You can scale the instance up or down dynamically if your traffic requirements surge and you need more capacity.
- If cost saving is an issue, you can shut down App Service instances to prevent them from incurring costs and they will
See also